Quick start
If you have installed the dependencies, as explained in section Dependencies, then you are ready to download the DISCOS deployment repository:
$ git clone https://github.com/discos/deployment.git
Cloning into 'deployment'...
Before installing the package, you have to install some additional Python 2.7 requirements. Move inside the deployment directory and type the following command:
$ cd deployment
$ pip install -r requirements.txt
Note
The last executed command will also install the most important tool on which the whole package relies: it is called Ansible. Ansible is a very powerful tool, able to perform a machine configuration applying a series of pre-defined tasks. It can also work in parallel when you need to configure multiple machines.
Now you are ready to install the package. The recommended way to do so is to install it inside a Python 2.7 custom environment. In order to do so, type the following command:
$ python setup.py install
If you want to install the package inside the system Python 2.7 environment instead, you have to execute the following command:
$ python setup.py install --user
Now that the package setup procedure is completed, you are ready to start deploying a DISCOS environment. In order to do so, keep reading the guide below.
Provision the system
The provisioning procedure is entirely handled by the discos-deploy
script, that has been installed in your system in the previous step.
Below you can find an explanation of how the script works, along with some
command line examples that show you how to deploy the DISCOS environment you want.
For instance, the following command will create the manager virtual machine,
and will install all dependencies and configuration files on it:
$ discos-deploy manager:development
In this case we gave the discos-deploy script the
manager:development argument. It means we want to deploy only the
manager machine, in the development environment. We will see more
about the environments in sections Development and
Production.
The deployment of a single machine takes about one hour, it has to download and install the operating system, all the dependencies (ACS, DISCOS libraries, etc.), create users and groups, configure the network, and create a complete working environment, as we will see in a few moments.
Note
You can run the deployment more than once, because the process is idempotent, that is, the result of performing the deployment once is exactly the same as the result of performing it repeatedly without any intervening actions. In fact, if you run the deployment process once again, it will take just a few minutes.
When the deployment procedure is complete, we will have the manager
virtual machine deployed with everything we need.
Get a DISCOS branch
Login via SSH to manager machine (or use the discos-login script
described in the Useful scripts section):
$ ssh discos@<manager IP address>
(branch?) discos@manager ~ $
Currently we have no active branch, that is why there is the (branch?) text
at the beginning of the prompt. To get a DISCOS branch and activate it, we have
to use the discos-get command. In the following case we get the master
branch for the SRT station:
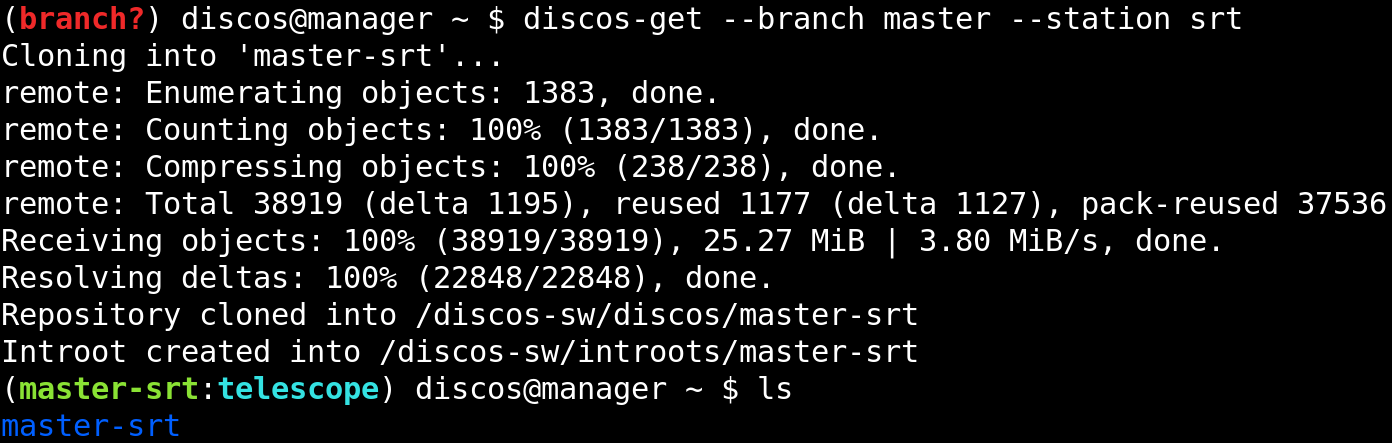
Note that this is not a code-block, but a screenshot of the shell.
As you can see the environment shows the prompt using a syntax highlight. The
branch? text has been replaced by master-srt:telescope, because we are
working on the branch master, using its telescope CDB, which is the
actual production CDB, hosted into SRT/Configuration. The INTROOT has
been created outside the discos user home directory, in order to enable
access to it to a generic observer user, and it shares the same name as the
downloaded branch. Also, you may have noticed that the discos-get command
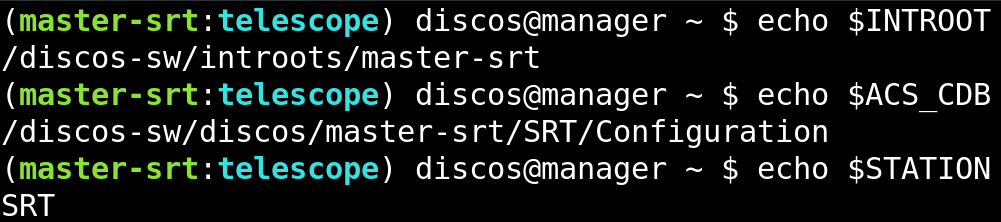
accepts a --station argument. This argument is required on development
machines, since they are generic and do not completely reflect the behavior of
a production machine. In case of production machines, the --station
argument is disabled since the station is already specified by the system
itself. This was made in order to avoid using a different station configuration
database. Here is the current environment:
Change the CDB
The discos-set command allows us to specifying the CDB.
We can choose either --cdb telescope or --cdb test:

Change the active branch
Sometime we want to have more than one branch and switch between them.
For instance, let’s get the stable branch for Medicina station:
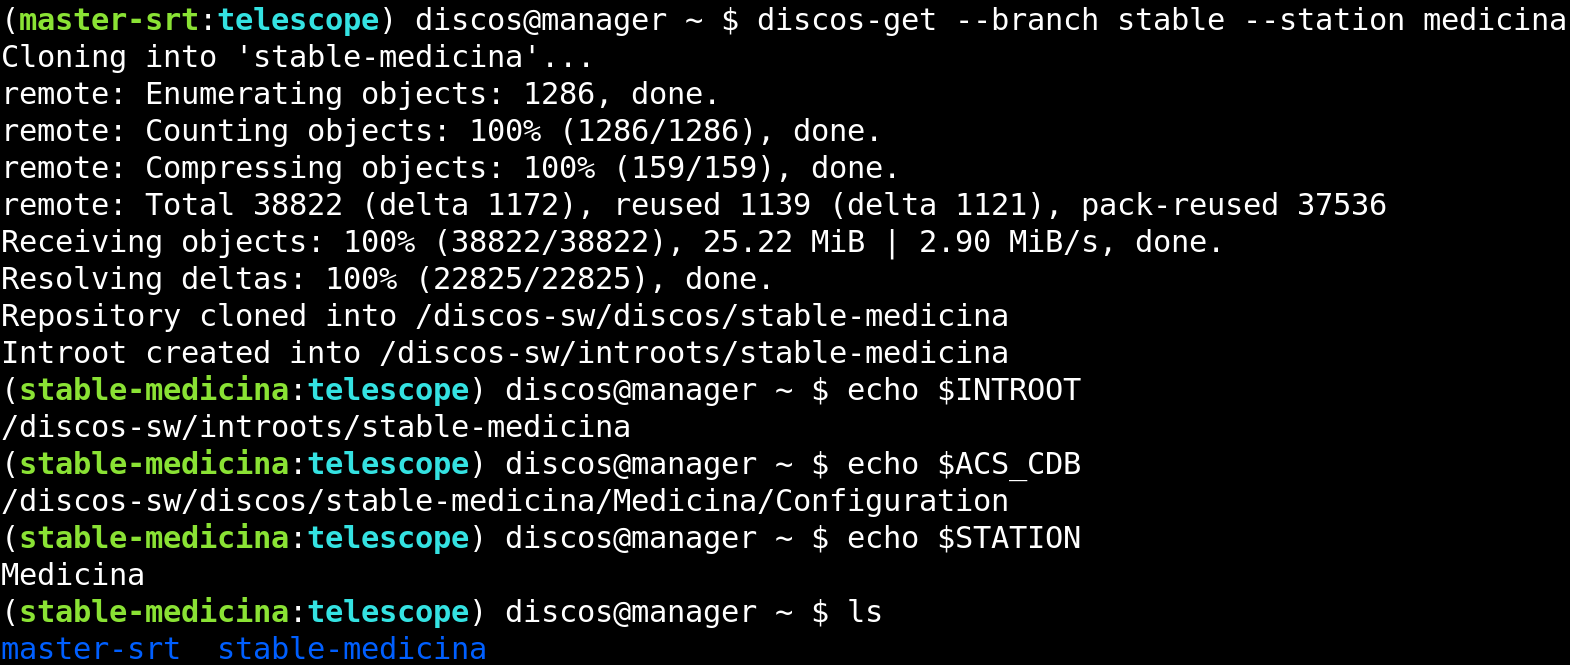
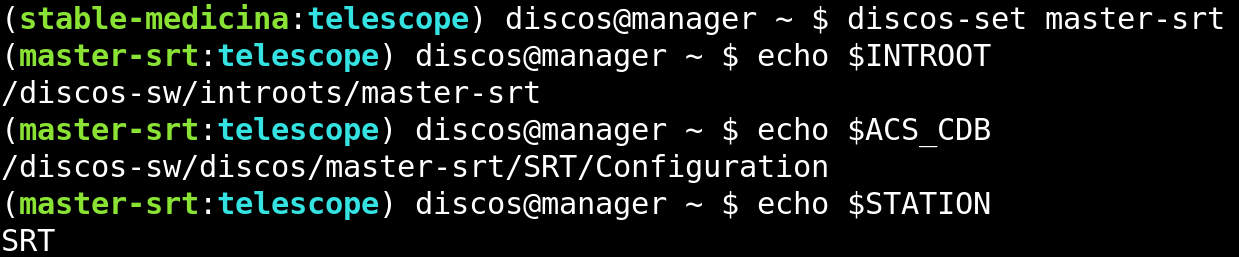
Now we have two branches, master-srt and stable-medicina, and the
latter is the active one. We can switch back to the master branch using the
discos-set command:
Remove a branch
To remove a branch, just remove the directory:

The related INTROOT will be deleted automatically right after the branch
directory is removed.
Install DISCOS
To install the DISCOS control system, execute the commands shown in the image below:

Note
The output of the make and make install commands shown above
was suppressed. The whole building and installation process can take up to
one hour or more, depending on your system.
What we have seen so far is enough for deploying a small development environment, but there is more to know. Maybe you want to deploy the whole system, composed of several VMs, or maybe you want to deploy the system on production machines. For more information about these topics have a look at the Development and Production sections. You will realize that everything is as easy as we saw here, and for deploying in production is even easier.